Our firm recently implemented Salesforce Marketing Cloud for a client that had about a dozen integrations that had complex transformations and communication rulesets. At the root was a Shopify Plus base with Recharge Subscriptions, a popular and flexible solution for subscription-based e-commerce offerings.
The company has an innovative mobile messaging implementation where customers could adjust their subscriptions via text message (SMS) and they needed to migrate their mobile contacts over to MobileConnect. The documentation for importing mobile contacts into MobileConnect is:
- Create the import definition in Contact Builder.
- Create an automation in Automation Studio.
- Add an import activity to the automation.
- When you configure the import activity, select the import definition you created.
- Schedule and activate the automation.
That sounds like a simple 5-step process, right? The reality is that it’s far more complex so we’ve decided to document it and share it here.
Detailed Steps to Automated Import of Your Marketing Cloud Mobile Contacts Into MobileConnect Using Automation Studio
The first step is creating your import definition in Contact Builder. Here’s a breakdown of the steps to do this.
- Create the import definition in Contact Builder by clicking on Create button in Contact Builder > Imports.

- Select List as your Target Destination type of improt you wish to perform.
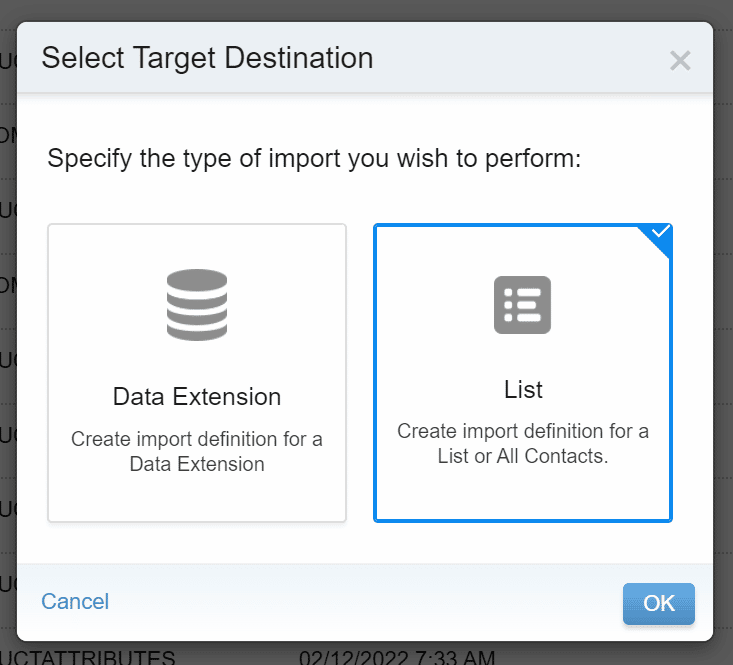
- Select Import Source. We chose to import from a temporary Data Extension that was preloaded with the data.
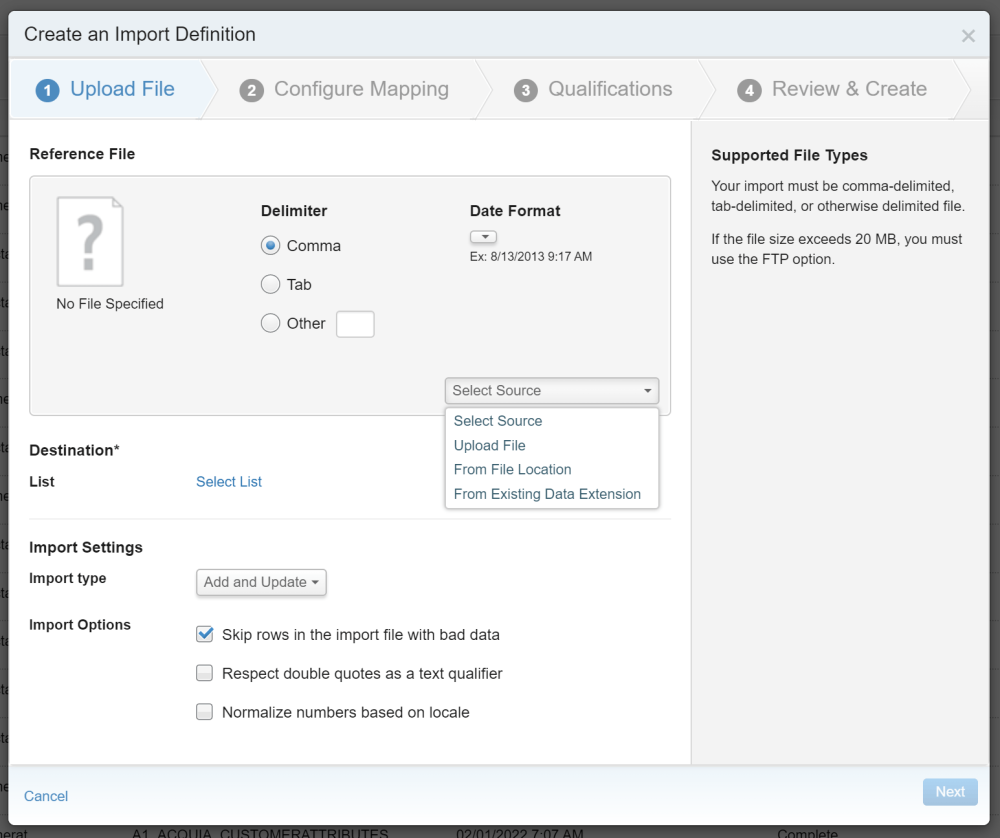
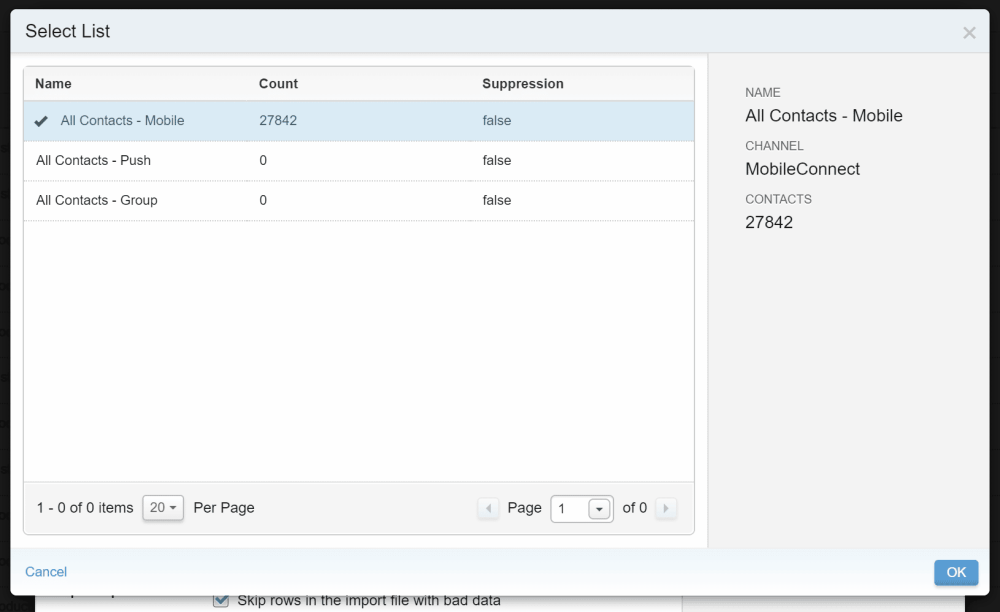
- Clock on Select List and Choose Your List (In our case, All Contacts – Mobile).
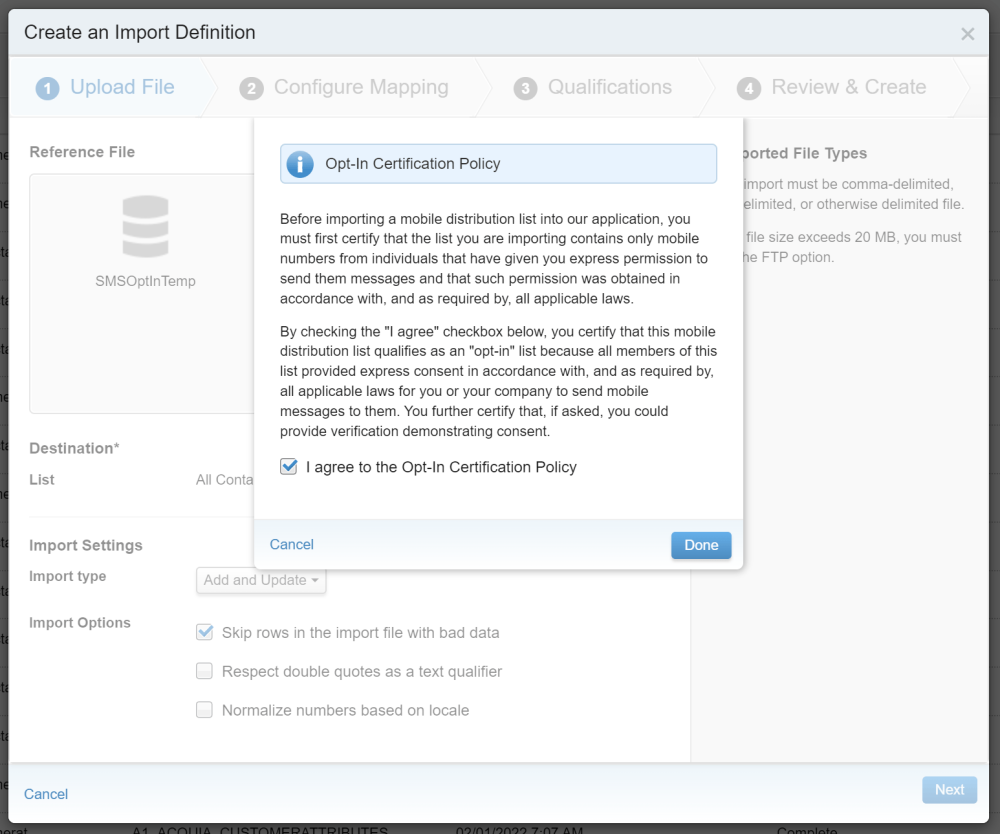
- These contacts have all opted-in and we are migrating them to MobileConnect, so you must Agree to the Opt-In Certification Policy.
- Map Your Import List Columns (we created the Data Extension with the ContactKey relationship already established).
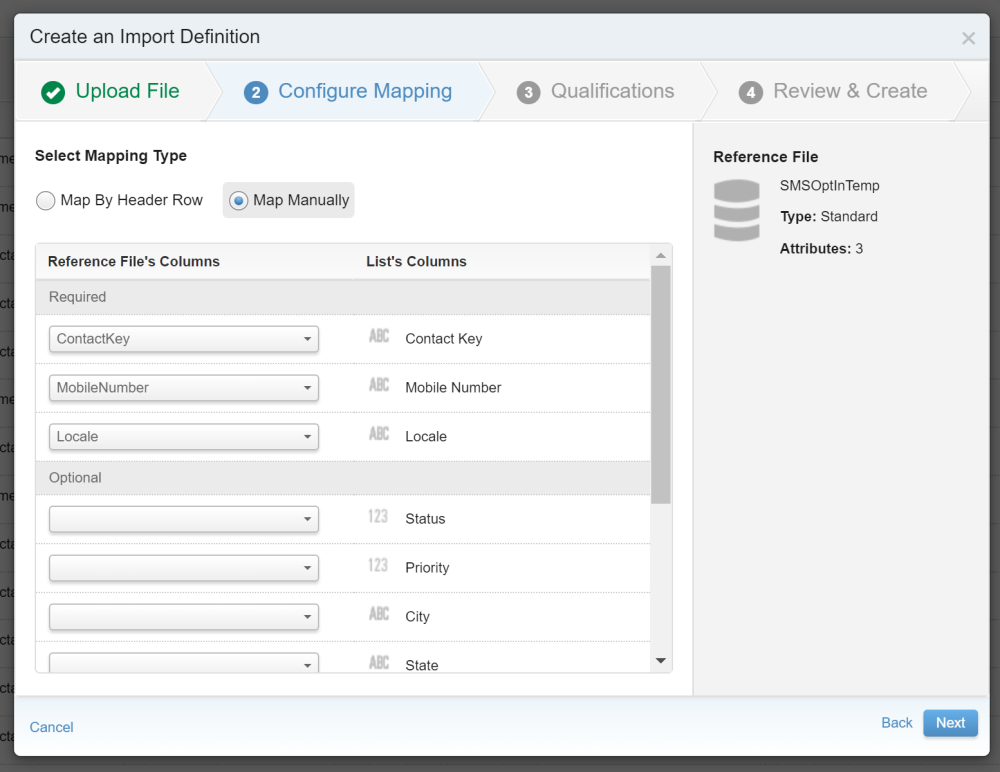
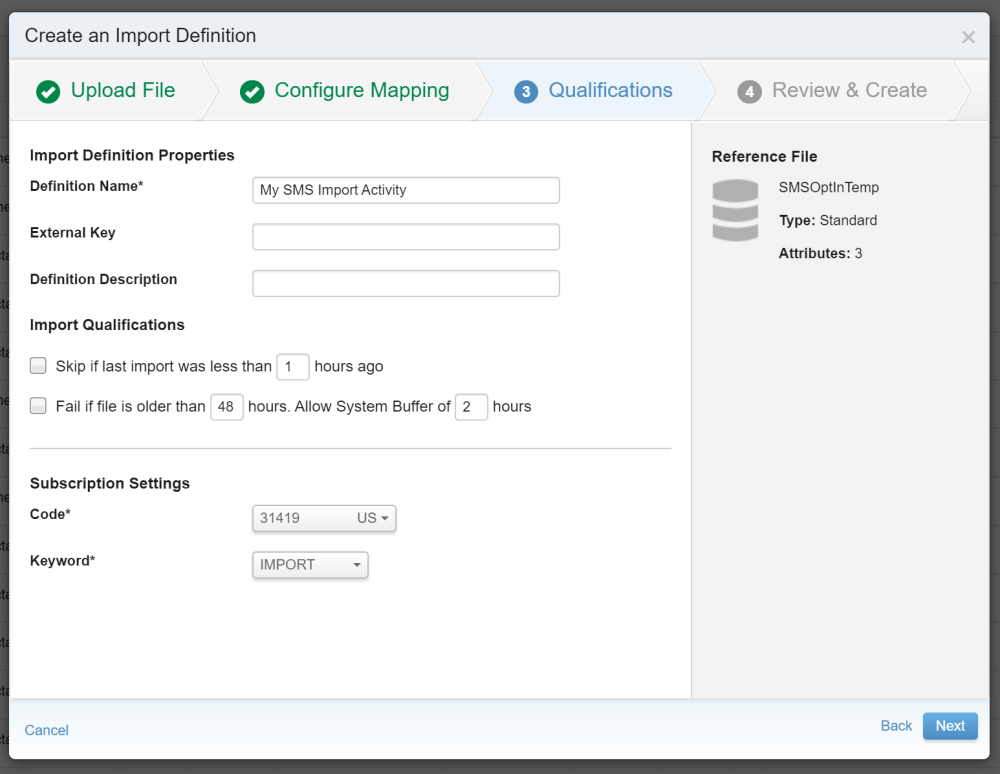
- Name your activity and choose your SMS Code and SMS Keyword.
- Confirm the wizard and click Finish to save your new activity. Be sure to add your email address for notifications so that you’re notified each time the import is executed with the results.
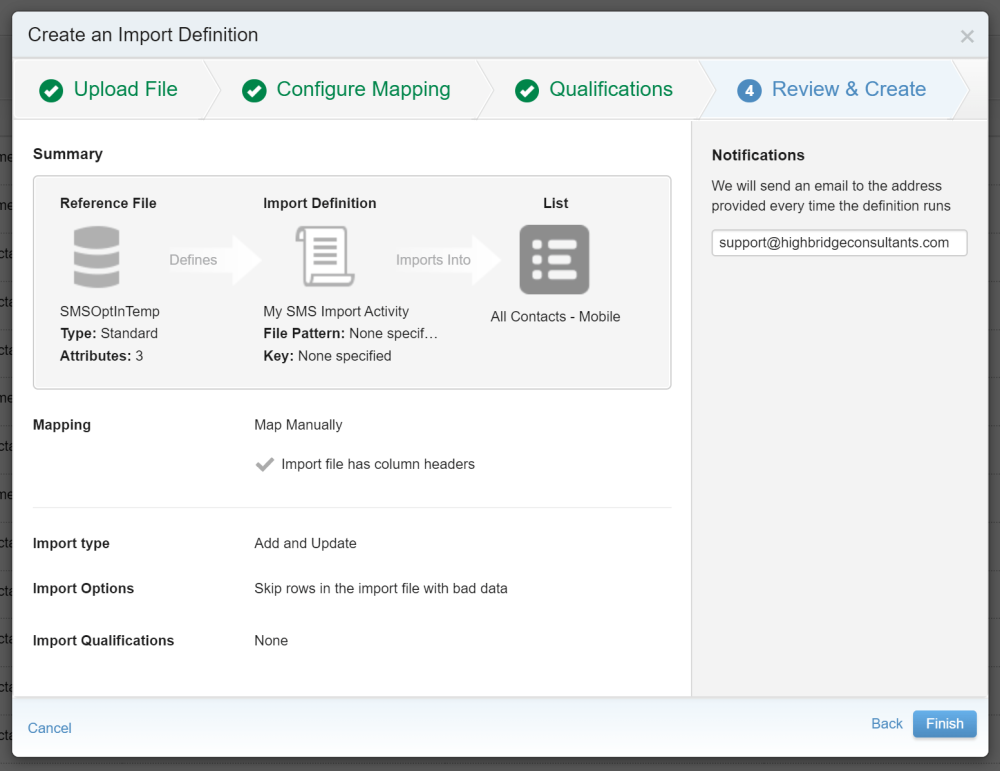
Your import definition is now saved and you can reference it in your Automation that you’re going to create in Automation Studio.
The steps to create an automation in Automation Studio are not very clear. DO NOT use the File Import Activity. Locate the SMS Activity where you can add the activity using the Import SMS Contact Activity.
- Add an import activity to the automation by selecting the import definition you created in step 8 above. You will need to expand the SMS folder where you’ll see your import definition.
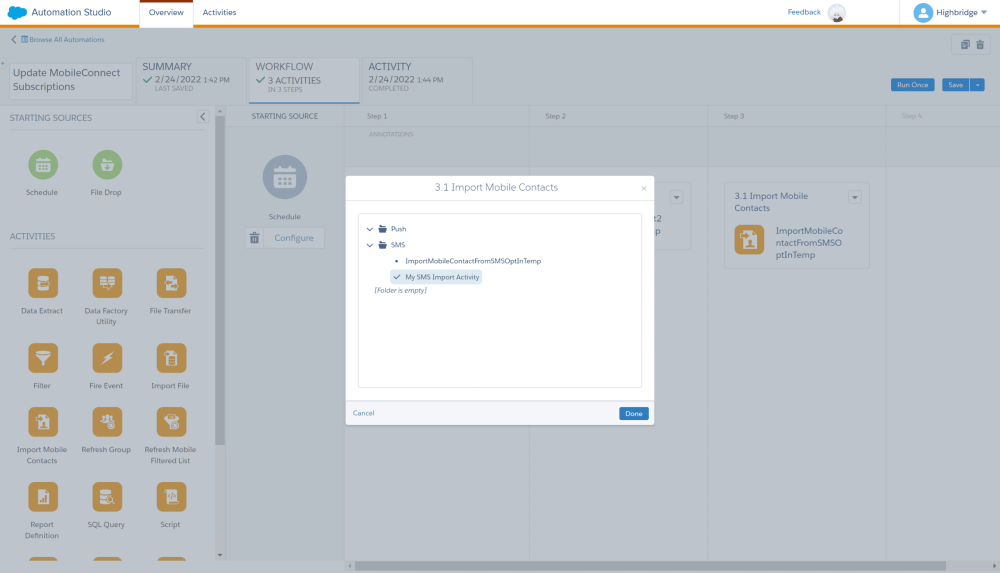
- Schedule and activate the automation. When your automation runs, your mobile contacts will be imported and you’ll be notified at the email address at step 8.
If you’re in need of assistance, don’t hesitate to contact us at Highbridge. We have done extensive implementations and migrations from other mobile marketing platforms to Mobile Cloud.
© 2021 DK New Media, LLC, All Rights Reserved

